.png)

Introduction: Why Webflow is Changing the Game
When it comes to creating websites today, you’ve got a buffet of options such as WordPress, Wix, Squarespace, Shopify, and of course, Webflow. But here’s the deal: most site builders fall into two camps. They’re either super easy but too restrictive (like Wix and Squarespace) or crazy flexible but overwhelming (like WordPress).
That’s where Webflow struts in. It’s the best of both worlds, a tool that gives you the power of custom coding with the ease of drag-and-drop design. Whether you’re a designer, freelancer, small business owner, or just curious about building your first site, Webflow promises a lot.
This guide will walk you through everything you need to know: what Webflow is, how it works, why it’s different, and step-by-step instructions to create your first site using a Webflow template. Think of it as your friendly roadmap into the world of visual web design.
What Exactly is Webflow?
At its core, Webflow is a visual web design and development platform. Imagine being able to build a professional website without writing endless lines of code, but still getting the same clean, production-ready code a developer would create.
A Visual Web Design Platform
Here’s how it works: you drag elements like text, images, and buttons onto the canvas. Every element is essentially a <div> or HTML tag, and when you style it (change colors, fonts, spacing), Webflow automatically writes the CSS for you. It’s like designing in Photoshop or Figma, but instead of a static picture, you’re making a real, live website.
Key Features at a Glance
- Designer: The drag-and-drop interface where you visually create your site.
- CMS: A built-in content management system for blogs, portfolios, or dynamic content.
- Ecommerce: Tools for creating full online stores.
- Hosting: Secure, lightning-fast hosting powered by AWS and Cloudflare.
Together, these make Webflow more than a site builder, it’s what some call a “website experience platform.”
Why Choose Webflow Over Other Website Builders?
With so many website builders out there, why bother learning Webflow? Simple: flexibility and control. Unlike Wix or Squarespace, which lock you into templates, Webflow lets you design however you want, like you’re writing code, but without actually coding.
Webflow vs Wix
- Wix is easy for absolute beginners, but it’s template-heavy and customization hits walls fast.
- Webflow gives you full creative control and professional features but comes with a steeper learning curve.
Webflow vs Squarespace
- Squarespace has gorgeous templates, perfect for artists or small businesses that want a polished site fast.
- But if you want pixel-perfect control or advanced animations, Webflow wins hands down.
Webflow vs. WordPress
- WordPress is the king of flexibility with its massive plugin ecosystem.
- The tradeoff? You need to manage hosting, updates, and security yourself.
- Webflow, on the other hand, handles hosting and security for you, while still letting you design like a pro.
Webflow’s Core Strengths and Advantages
If you’ve dabbled with other site builders before, you’ll notice that Webflow feels different right out of the gate. It’s not just about tossing text and images onto a page, it’s about giving you real creative freedom without tying your hands behind your back. Let’s break down its main strengths.
Total Design Flexibility
Unlike template-driven builders, Webflow is like a blank canvas. Want your homepage hero section to have a layered video background with text that animates on scroll? No problem. Need a blog layout that looks nothing like the cookie-cutter designs you see everywhere? Done.
With Webflow, every pixel is under your control. You’re essentially designing with the power of CSS, but through an interface that feels approachable. This makes it ideal for designers who want creative freedom without being stuck learning to code.
Clean, Exportable Code
Here’s where Webflow really shines: even though you’re designing visually, Webflow generates clean, semantic HTML, CSS, and JavaScript under the hood. That means no bloated code slowing down your site (a common problem with drag-and-drop builders).
And yes, you can even export the code if you ever want to host elsewhere or hand it off to a developer. That’s a big deal compared to platforms like Wix or Squarespace, where you’re locked into their ecosystem.
Built-in Animations and Interactions
This is where Webflow feels like magic. Want elements to fade in as users scroll? Or a button that morphs into a new shape on hover? Webflow has powerful animation tools baked in, no plugins needed.
These interactions elevate your site from “basic” to “wow.” And you don’t need to touch a line of JavaScript to make it happen. Also, recently Webflow added new animation version with Gsap, it can be used to create really cool stuff.
CMS and Ecommerce Made Simple
Webflow isn’t just for static websites. Its built-in CMS (Content Management System) makes it easy to set up blogs, news sections, or team member profiles. You create a “Collection” (like Blog Posts), add fields (title, image, body text), and boom, dynamic pages are generated automatically.
For ecommerce, Webflow lets you build full online stores complete with product catalogs, shopping carts, and checkout. Think Shopify-lite, but fully customizable in design. Checkout our Webflow vs Shopify guide for detail information.
Webflow Apps (Integrations)
Webflow isn’t just about design, it’s also about functionality. Enter Webflow Apps, which let you connect your site to powerful tools for SEO, analytics, marketing, forms, automation, and more.
Think of apps as little superpowers you can add to your website, helping it grow and work smarter.
Webflow Cloud
Webflow Cloud is Webflow’s serverless hosting & deployment platform that lets you run full-stack apps (e.g., built with Next.js or Astro) alongside your Webflow site, without separate hosting or tricky DNS.
It plugs into GitHub, supports multiple environments, and runs on an edge runtime (Cloudflare Workers) for low-latency performance.
Understanding Webflow Hosting
Another perk of Webflow is that you don’t need to mess around with separate hosting providers. Everything is baked in. And we’re not talking basic shared hosting here, it’s enterprise-grade stuff.
Enterprise-Grade Infrastructure
All Webflow sites are hosted on Amazon Web Services (AWS) and served through Cloudflare’s global CDN. Translation: your site loads fast no matter where in the world your visitors are.
You also get modern protocols like HTTP/2 and HTTP/3 out of the box, which further speed things up.
Security, Speed, and Scalability
Webflow hosting includes:
- Free SSL certificates for every site.
- DDoS protection (so hackers can’t flood your site).
- Automatic image optimization to shrink file sizes without losing quality.
- Crazy uptime guarantees (Enterprise plans even promise 99.99% SLA).
In short: your site is safe, fast, and scales automatically, even if it suddenly goes viral and millions of people visit at once.
Webflow Pricing Explained
Let’s be honest: Webflow isn’t the cheapest option out there. But what you’re paying for is convenience, flexibility, and performance. Pricing is divided into Site Plans (for each website you publish) and Workspace Plans (for teams or freelancers).
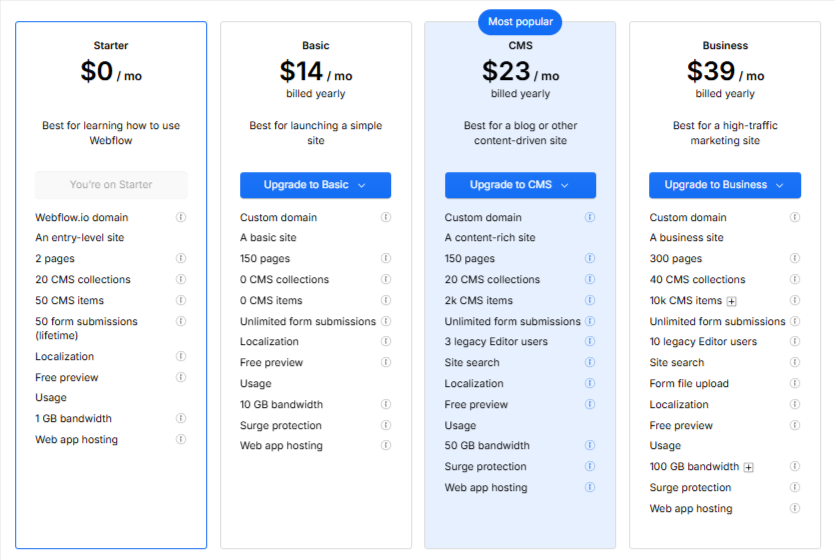
Site Plans
- Starter (Free): Test things out, but limited to a webflow.io subdomain.
- Basic ($14/mo): Great for simple static sites and custom domains.
- CMS ($23/mo): Perfect for blogs and content-heavy sites (up to 2,000 CMS items).
- Business ($39/mo): For higher-traffic sites (up to 20k CMS items and 2.5TB bandwidth).
- Enterprise: Custom features, unlimited scaling, dedicated support.
Workspace Plans
These are account-level plans, perfect if you’re a freelancer or agency building multiple sites.
- Freelancer ($16/mo per seat): Manage client projects with a few collaborators.
- Agency ($35/mo per seat): Advanced permissions and unlimited staging sites.
- Core/Growth ($19–49/mo per seat): For in-house teams.
- Enterprise: Tailored to big organizations.
Step-by-Step: Building Your First Webflow Site (with a Template)
Starting with a blank canvas can feel intimidating, especially if you’re brand new to web design. The good news? Webflow makes things easier with hundreds of free and premium templates you can use as a foundation. Here’s a simple step-by-step walkthrough for creating your first site using a Webflow template.
1. Sign Up and Pick a Template
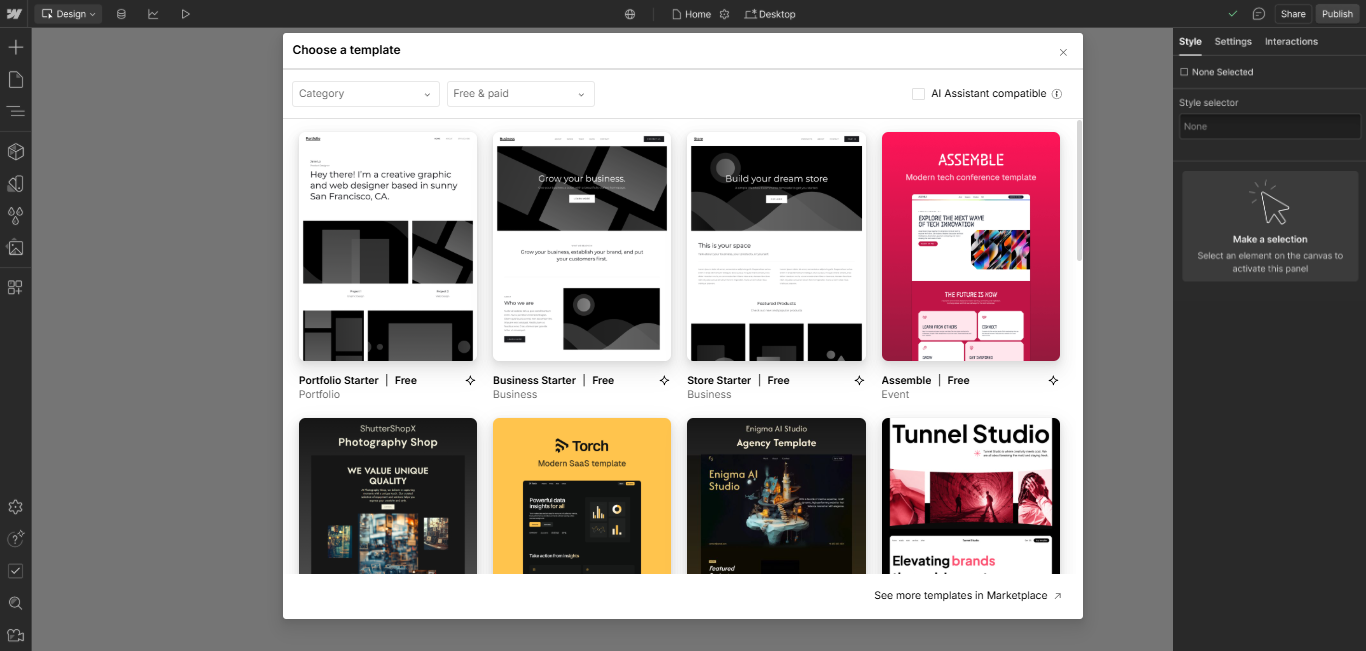
Head to Webflow.com and log in, or sign up if you don’t have an account yet. In your Dashboard, click “New Site”, then clicked on the Template tab.
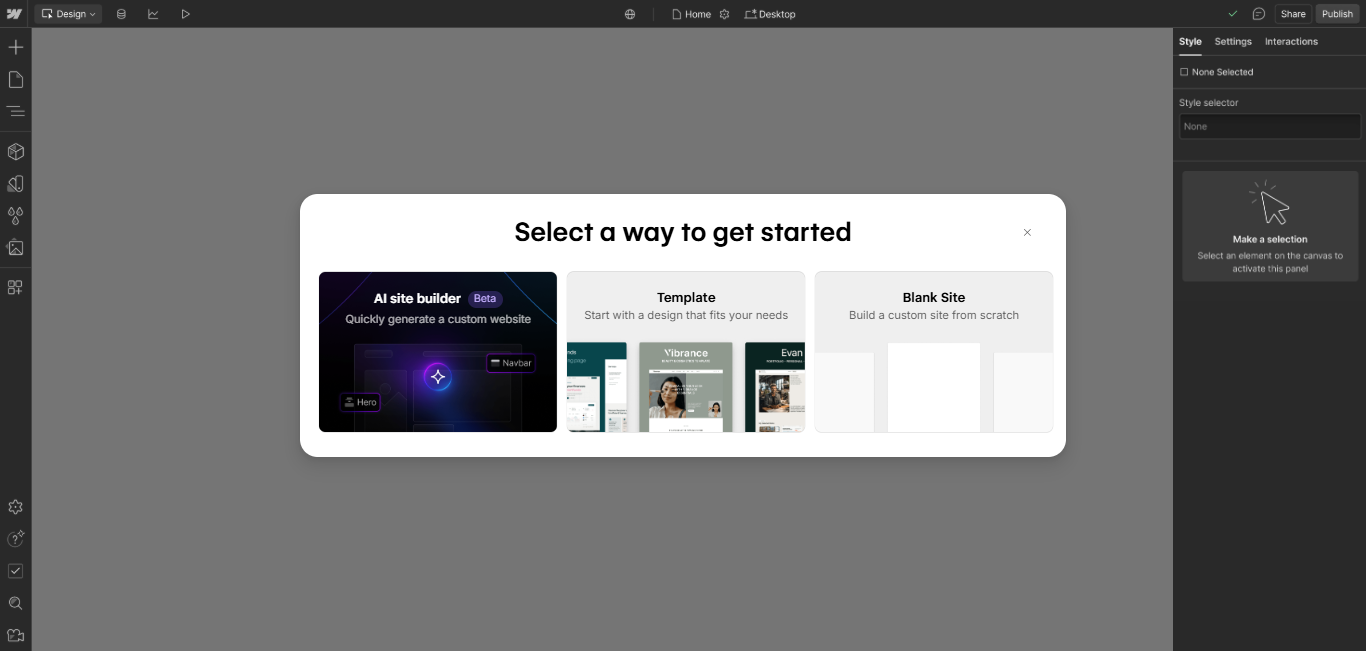
Then, You’ll see filters for free vs. premium, categories (e.g., portfolios, e-commerce, blogs), styles, industries, and more. Pick a template that fits your brand and the features you need.
2. Create a New Site Using the Template
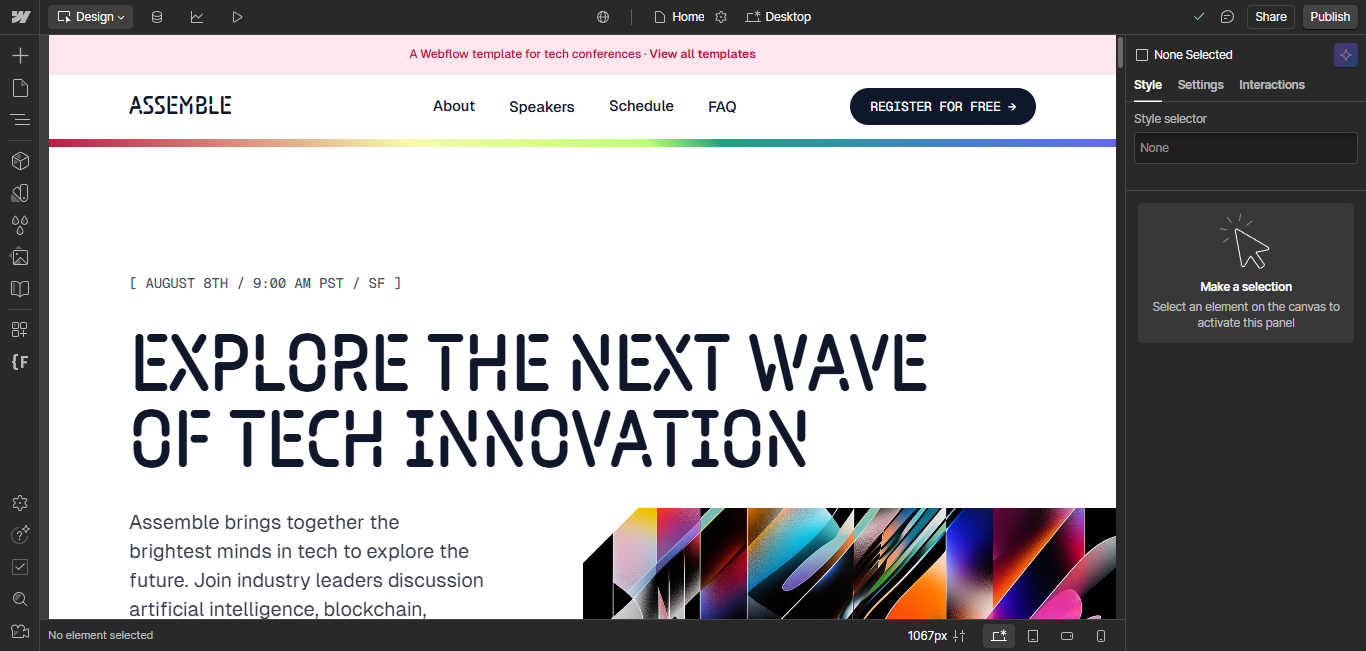
Once you've chosen a template, Webflow will create a new project for you, complete with all pre-built pages, global styles, and assets from the template. It’s now your project's starting point.
3. Familiarize Yourself with the Designer Interface
When the template loads, the Designer will open immediately. This interface includes:
- Left Panel (Navigator): Shows the hierarchy of all elements on your page.
- Canvas: Displays the live view of the page where you can visually edit.
- Right Panel (Style & Settings): Modify typography, colors, spacing, layout settings, interactions, and more.
- Top Toolbar: Tools for preview, device toggles (Desktop, Tablet, Mobile), CMS Access, Insights , and publish.
Take a moment to click around, preview the template across device modes, and get comfortable navigating these areas.
4. Customize Global Styles and Branding
Templates typically include a Style Guide page. It’s your headquarters for updating brand colors, typography, and global settings:
- Select the Body (All Pages) element and set your default font, font size, and line height.
- Update global color swatches to match your brand palette (e.g., primary, secondary, accent colors).
- Optionally, upload a custom font (via Project Settings under Fonts), or use any built-in Google Font.
Once updated, these changes will automatically cascade across the entire site, ensuring consistency.
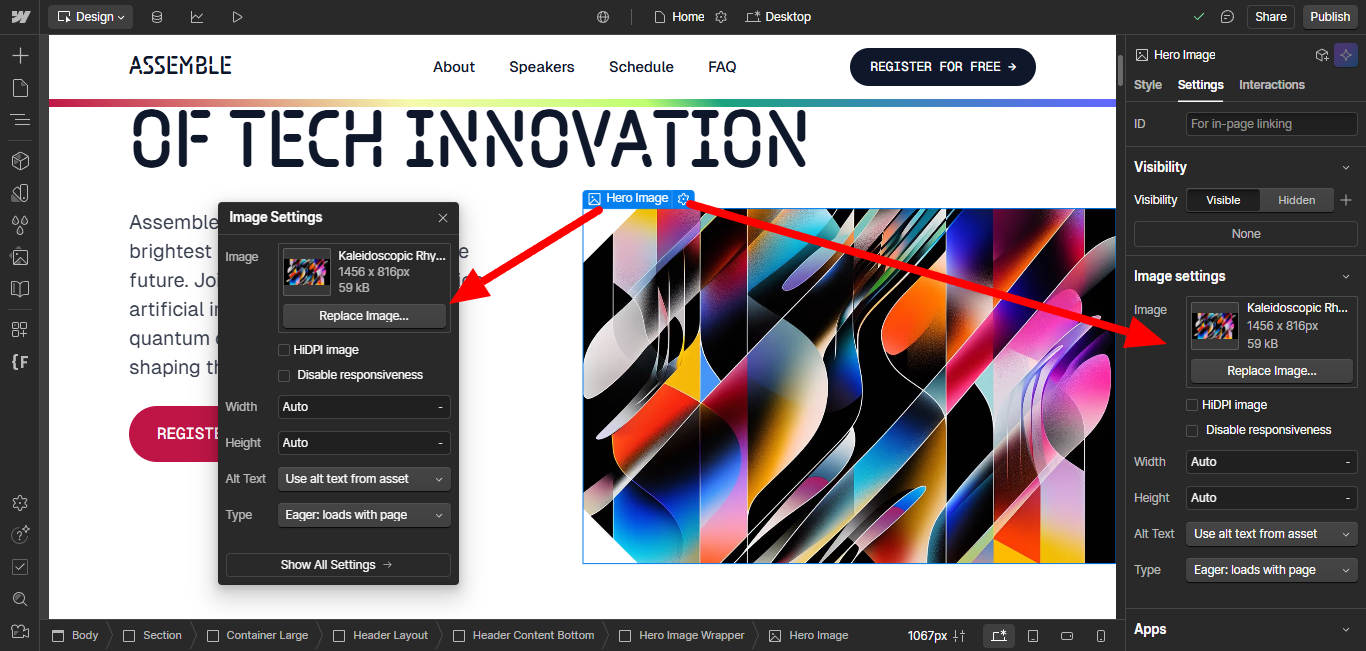
5. Replace Placeholder Content with Your Own
Templates come with dummy text and stock images. Start swapping them with your own content:
- Double-click on headings, paragraphs, or text blocks to replace copy.
- Swap template images with your own high-quality visuals via the Asset Manager or direct upload.
- Edit links, buttons, and forms to point to your actual pages or actions.
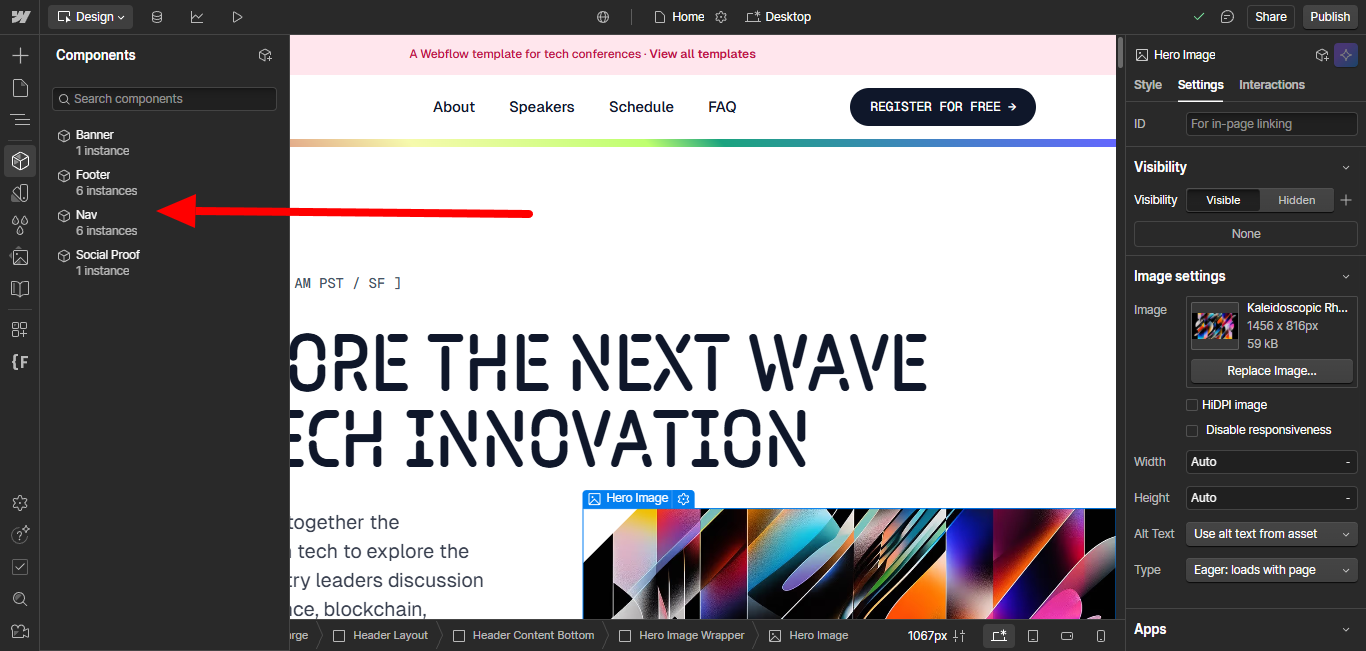
- Update Symbols (reusable components like headers and footers) if your template uses them, for style or copy changes.
6. Add, Remove, or Move Sections
You’re not stuck with the layout the template gives you:
- Add pre-designed sections (like testimonials, features, team) from components or by duplicating existing ones.
- Delete sections you don’t need.
- Rearrange sections via drag-and-drop in the Navigator or directly on the Canvas.
Templates are meant to be flexible, so don’t hesitate to tweak layout structure to suit your goals.
7. Check and Adjust Responsiveness
Most templates are mobile-responsive out of the box, but you still need to check and fine-tune:
- Use device preview (top toolbar) to switch between desktop, tablet, and mobile views.
- Adjust padding, margins, flex or grid settings where needed to make layouts look clean.
- Collapse, show or hide specific elements per device, if necessary.
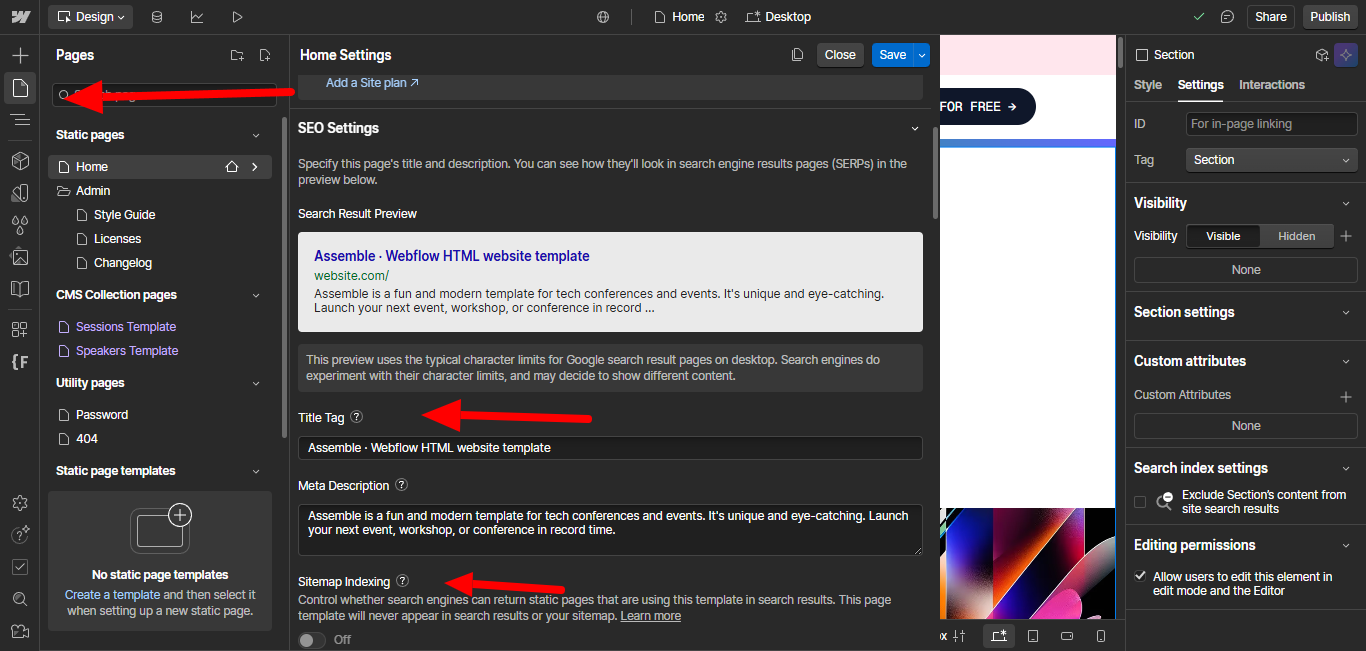
8. Set Up Pages and Navigation
Head to the Pages panel:
- Review the template’s existing pages.
- Rename pages, edit SEO settings (title tags, meta descriptions).
- Remove menu items or pages not relevant to your site.
- Make sure your Navbar links correctly reflect your pages.
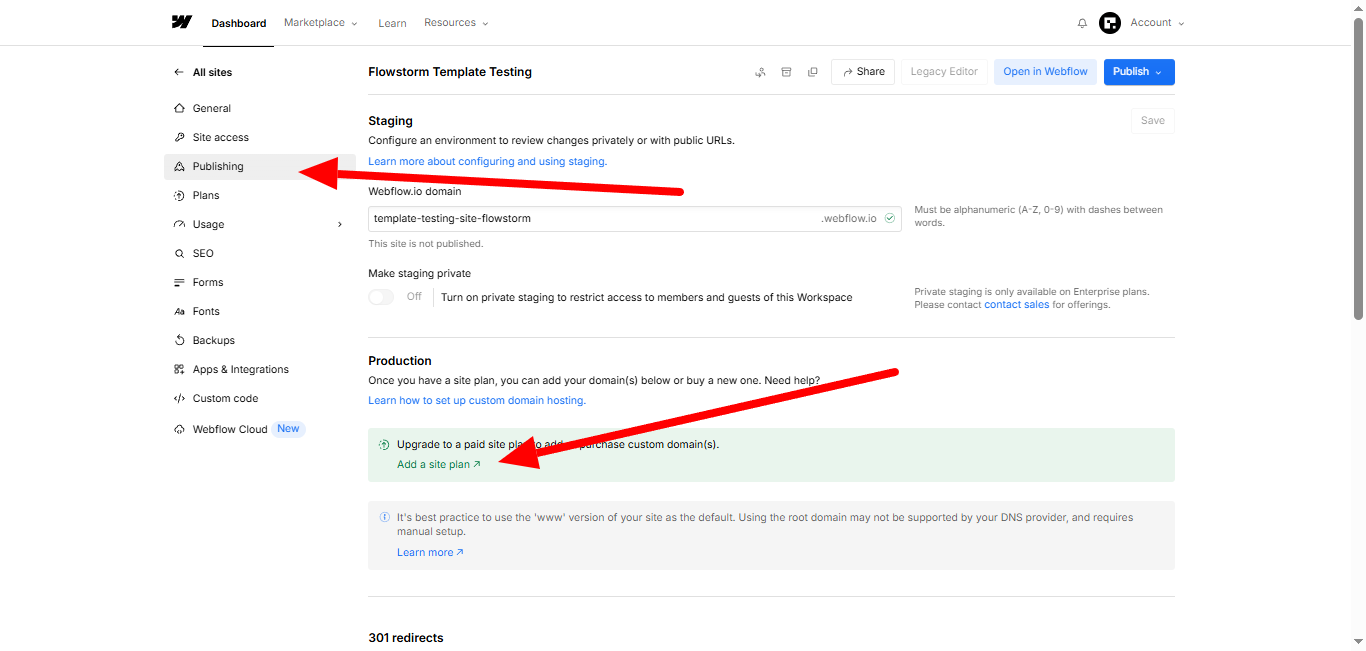
9. Connect Your Custom Domain & Pick a Plan
When you’re ready for launch:
- Go to Site Settings → Publishing.
- Choose a Site Plan:
- Basic for simple static sites,
- CMS if you have dynamic content (blogs, collections),
- Business / Enterprise for higher traffic and CMS limits.
- Add your custom domain.( You can buy a custom domain from the Namecheap, GoDaddy)
10. Preview and Publish Your Site
Before going live:
- Click Preview to check functionality and responsiveness on different devices.
- Thoroughly test all links, forms, buttons, and interactions. Download this Webflow Website Pre-Launch QA Checklist for detail checklist.
- When satisfied, hit Publish (top-right) to launch your site to the web, on both Webflow’s domain and your custom domain.
Want a professional Webflow site without the DIY stress? Flowstorm will customize your chosen template, adding your brand, content, and unique style; so you get a polished, responsive website that feels completely custom. Checkout our our Webflow template customizatio service.
Webflow Editor for Clients and Teams
One of the coolest parts about Webflow is how it separates the Designer (where the magic of layout and styling happens) from the Editor (where content updates happen). This makes life easier for both designers and clients.
Content Editing Made Easy
Imagine you’ve built a beautiful blog for a client. Instead of giving them access to the complex Designer, you invite them to the Webflow Editor. From there, they can:
- Add new blog posts
- Update text and images
- Change pricing or product details
All without accidentally breaking the design. It’s kind of like giving them a “safe mode” for content editing.
Collaboration Features
If you’re working with a team, Webflow’s Workspace plans allow for:
- Multiple collaborators with different roles and permissions
- Shared libraries of assets and components
- Staging environments so you can preview changes before going live
In other words, Webflow isn’t just for solo designers, it’s powerful enough for agencies and in-house teams too.
Common Challenges Beginners Face (and How to Overcome Them)
Let’s be real: no tool is perfect. Here are some hurdles most beginners run into, plus tips to smooth things out.
The Learning Curve
Webflow is more advanced than Wix or Squarespace. At first, the interface might feel intimidating.
Pro Tip: Start with a pre-made template and customize it instead of starting from scratch. Also, check out Webflow University, it’s packed with free video tutorials.
Managing Costs
While Webflow’s free plan is great for learning, real websites need paid Site Plans (starting at $14/month). If you’re just building a personal portfolio, this might feel pricey.
Pro Tip: Start small with the Basic or CMS plan, and upgrade later if your traffic grows.
Exporting vs. Staying in Webflow
Yes, you can export your code. But once you leave Webflow hosting, you lose features like the CMS and Editor.
Pro Tip: If you plan to use Webflow’s CMS long-term, stick with Webflow hosting, it’s worth the convenience.
Getting Professional Help When You’re Stuck
Feeling stuck or just don’t have the time to do it all yourself? Webflow offers an Expert Directory where you can find professional designers and developers who live and breathe Webflow.
They even provide a matching service that connects you with the right pro for your project. So, if you need help, you’re never on your own.
Real-Life Examples of Webflow in Action
Sometimes the best way to understand a tool is to see it in action. Here’s how different people use Webflow to bring their ideas to life.
1. Portfolios and Personal Brands
For designers, photographers, writers, and freelancers, a portfolio isn’t just a website, it’s their digital first impression. Webflow makes it easy to create a portfolio that’s both unique and interactive, so you don’t blend in with the sea of cookie-cutter sites.
Why Webflow works for portfolios:
- Total freedom to experiment with layouts, typography, and animations.
- Built-in CMS collections for blogs or case studies, making it easy to showcase projects.
- Smooth scroll animations and interactions that wow visitors without writing JavaScript.
- Templates that can be customized to match a personal brand in just a few clicks.
Example: A freelance designer can create a one-page scrolling site with bold animations, while a photographer can build a clean, gallery-style portfolio with dynamic project pages, all powered by Webflow.
2. Business Websites and Startups
Small businesses and startups love Webflow because it balances speed with professionalism. You can go from concept to launch in weeks (or even days) without dealing with complex server setups or WordPress plugins.
Why Webflow works for businesses:
- Templates tailored to industries like SaaS, consulting, restaurants, and agencies.
- Built-in hosting means no messing around with cPanel, servers, or updates.
- The CMS makes updating content simple, think adding a new service page, posting news, or swapping images.
- Scalability: Start small and upgrade plans as your site traffic grows.
Example: A new SaaS startup can launch a marketing site with a blog and pricing page in Webflow, then update it easily as they grow. A local café could build a sleek site with a menu, events calendar, and contact form, all without hiring a full-time developer.
3. E-commerce Stores
For entrepreneurs and product-based businesses, Webflow offers an e-commerce platform that blends design freedom with powerful store features. Unlike Shopify, where themes can feel restrictive, Webflow lets you design every pixel of your storefront.
Why Webflow works for e-commerce:
- Fully customizable product pages and checkout flows.
- Dynamic CMS collections for product catalogs, add new items once, and they’re auto-styled across the site.
- Built-in integrations for payments, shipping, and taxes.
- Ability to design unique shopping experiences, from interactive product galleries to branded checkout pages.
Example: A clothing brand can create a stylish online store that matches its vibe, complete with custom product animations and mobile-friendly layouts. A niche shop selling handmade crafts can design a store that feels personal and authentic, standing out from generic Shopify templates.
4. Agencies and Teams
Webflow isn’t just for solo creators or small businesses, it’s also a powerful platform for agencies and collaborative teams. Agencies love Webflow because it allows them to deliver high-quality, custom websites faster, while teams inside larger companies use it to streamline their workflows.
Why Webflow works for agencies and teams:
- Faster project turnaround: Visual development cuts down coding time, so agencies can deliver sites to clients in weeks instead of months.
- Team collaboration: With Webflow’s Workspace plans, multiple team members can work on the same project, share assets, and manage permissions.
- Client-friendly editing: Instead of asking the agency to update every small change, clients can use the Editor to tweak content (like blog posts or contact details) without breaking the design.
- White-labeling & code export: Agencies can fully brand their services or hand over code if clients prefer external hosting.
Example: A digital marketing agency can design and launch multiple client websites in Webflow, maintain them through the Editor, and scale projects without worrying about server management. A larger in-house team can collaborate on a corporate website, with designers handling layouts, marketers editing content, and developers adding custom code, all in the same platform.
FAQs About Webflow
Let’s tackle some of the most common questions beginners ask.
1. Is Webflow good for beginners?
Yes, but with a caveat. It’s not as “instant” as Wix or Squarespace. Expect a learning curve, but once you get the hang of it, you’ll be able to create way more advanced designs.
2. Does Webflow require coding?
Nope! You can build entire sites without touching code. That said, if you do know HTML/CSS, you’ll appreciate the level of control Webflow gives you.
3. How much does Webflow really cost?
Webflow has a free plan, but to connect a custom domain you’ll need at least the Basic Plan ($14/month). Content-heavy sites typically use the CMS Plan ($23/month).
4. Can I move my Webflow site elsewhere?
Yes, you can export the code. However, you’ll lose Webflow-specific features like CMS and hosting.
5. Is Webflow better than WordPress?
It depends. Webflow is easier for design and hosting, while WordPress has a larger plugin ecosystem. If you hate dealing with plugins and hosting, Webflow is probably better.
6. Do I need hosting if I use Webflow?
Nope. Hosting is included in all Site Plans and powered by AWS + Cloudflare.
Conclusion: Is Webflow Right for You?
So, after this deep dive, should you jump into Webflow?
If you want a beginner-friendly tool with advanced design freedom, Webflow is a fantastic choice. It strikes a balance between ease of use (no code required) and professional power (flexibility like hand-coded sites).
- If you’re an absolute beginner who just wants a quick website: Wix or Squarespace might feel easier at first.
- If you’re a designer, freelancer, or small business owner who wants total creative control and a scalable platform: Webflow is the way to go.
In short: Webflow is like training wheels for coding, without the scary part of actually coding. Once you get over the learning curve, you’ll be able to build websites that look and feel completely custom.
